News


News

Proper Installation and Error Prevention for Waterproof Electrical Connectors
Release time:2025-09-04
viewed:236
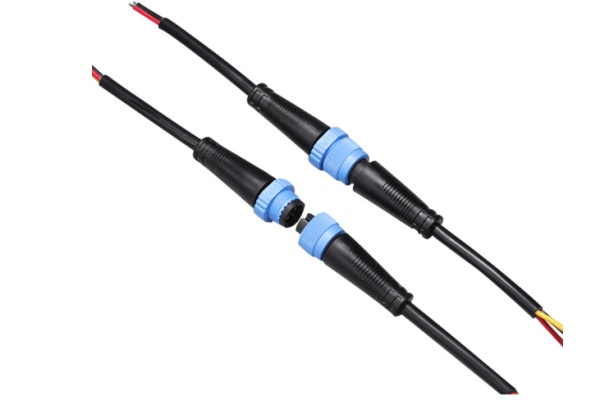
Waterproof electrical connectors are the unsung heroes keeping moisture out of electrical systems. They shield against corrosion, short circuits, and equipment breakdowns—whether in a car’s engine bay, outdoor security cameras, or marine gear. But their effectiveness depends entirely on how well they’re installed. Miss a step, and even the best connectors fail. This guide walks through the key installation steps, points out common mistakes, and explains why getting it right matters so much for keeping water out.

Waterproof Electrical Connectors Step-by-Step Installation Guide
Preparing the Wires
Start with clean, precise wire stripping. Use a proper wire stripper to remove about 1/2 inch of insulation—knives or dull tools will nick the wires, creating weak spots. For smaller wires, check the connector specs—some need just 3/16 inch of exposed metal to work right . The stripped part must be totally clean—no oxidation, no dirt. Even tiny debris can ruin the seal later. A common slip-up here? Stripping too much. Extra bare wire beyond the terminal’s seal area becomes a direct path for water to seep in.
Getting the Crimp Right
Crimping isn’t just about connecting wires electrically—it’s about sealing them too. Always use a ratcheting crimp tool for consistent pressure. Before crimping, slide the correct size seal onto the wire. These rubber rings should fit snug around the insulation, with their narrow end tucked under the terminal’s crimp tabs. When you crimp, this locks the seal in place, creating a double barrier against moisture . Skip the generic pliers here. A loose crimp won’t just cause electrical issues—it lets water sneak in, and the heat from a bad connection will break down seals faster.
Sealing: The Make-or-Break Step
This is where Waterproof electrical connectors earn their name. Check O-rings carefully before installing—look for cracks or nicks, and make sure they’re clean. Use the right lubricant (silicone on silicone rings can cause swelling, so check compatibility). Seat them straight in their grooves—no twists allowed . Heat shrink tubing, if used, should cover three times the joint length, overlapping insulation on both sides. Heat it evenly until it shrinks tight, with no bubbles . For extra protection, brush on silicone sealant over crimps and seals. Let each coat dry fully before adding another. Cutting corners here—like using a damaged O-ring or rushing the sealant—guarantees leaks later.
Locking It Down Properly
The final lock completes the waterproofing. Threaded connectors need just the right torque—enough to compress seals without warping them . Snap-lock types should make a clear “click” to confirm they’re set. Over-tightening ruins threads or crushes seals; too loose, and gaps form. Follow the assembly order for multi-part connectors—end caps, grommets, and shells must go on in the right sequence so grommets squeeze evenly around the cable . Outdoor setups need a drip loop too—let the cable hang in a U-shape below the connector to divert rain away from the joint.
What Happens When Installation Goes Wrong
Small mistakes turn into big problems fast. A twisted O-ring or poorly seated compression fitting might start with a tiny leak, but vibration and temperature changes widen the gap over time . Loose crimps make it worse—they let water in while generating heat that breaks down seal materials. Before long, contacts corrode, resistance spikes, and the system fails. This isn’t just an annoyance—think about marine equipment or outdoor sensors where water damage can shut down critical operations.
Vibration is the silent killer of bad connections. Connectors that aren’t fully locked will work loose gradually, breaking the seal compression . Dirt trapped during installation—like a speck of dust on an O-ring or stray wire strands in the seal area—creates permanent leak paths. No amount of re-tightening fixes that. Every step matters because waterproof electrical connectors rely on every component working together to block moisture.
Installing Waterproof electrical connectors isn’t complicated, but it demands care at every stage. Strip wires to the right length to protect seal margins. Crimp properly to secure both electricity and waterproofing. Seal meticulously to block all moisture paths. Lock firmly but gently to maintain that seal long-term. Skip any of these, and you’ll end up with connectors that can’t do their job. In the end, taking time with each step ensures these small but crucial components keep electrical systems safe and dry—no matter what the environment throws at them.